2025-11-10 Pack Fit Checklist: 10 Lab-Tested Backpack Adjustments to Stay Comfortable on Fall Hikes
By Linnea Sørensen • 10th Nov
Fall hiking rewards you with quiet trails, cool air, and golden light, yet small fit mistakes can turn a scenic ridge walk into a shoulder-burning trudge. This blog post for 2025-11-10 distills the most reliable backpack adjustments our testers and lab technicians have validated to keep you comfortable when the weather swings and layers come on and off. You will learn why fit changes with terrain and temperature, what the key angles and strap tensions should be, and how to tune your pack in minutes at the trailhead. Throughout, we reference Hiking Pack Fit’s real-world and lab-backed reviews plus our diverse fit database for personalized pack matching, so you can apply guidance that matches your body, your load, and your goals.
Why Pack Fit Matters on Crisp Fall Trails
When temperatures drop, you add layers that subtly change the geometry between your back and your pack. A jacket collar can lift shoulder straps, thicker midlayers can shorten your effective torso length, and gloves can tempt you to overtighten buckles. Biomechanics research and field data converge on a simple truth: load carried closer to your center of mass and transferred primarily to the pelvis reduces perceived exertion and hotspots. That is why hip-belt placement, load lifter angle, and sternum strap height are not cosmetic tweaks. They are force-management tools that keep the pack stable while your stride lengthens on cooler, faster miles.
Moreover, fall surfaces vary from dry leaves to early frost and wet roots, and instability amplifies any fit flaw. A top-heavy pack behaves like a pendulum that exaggerates side-to-side sway on uneven ground. By re-centering the load against the spine and setting the correct strap angles, you minimize oscillation and protect your shoulders and lower back. Our Hiking Pack Fit field tests across mixed terrain suggest hikers who shift most of the load to the hips report fewer trapezius pinch points and maintain pace longer. Think of these adjustments like tuning a musical instrument: small turns bring the whole system into harmony.
The blog post for 2025-11-10 Pack Fit Roadmap
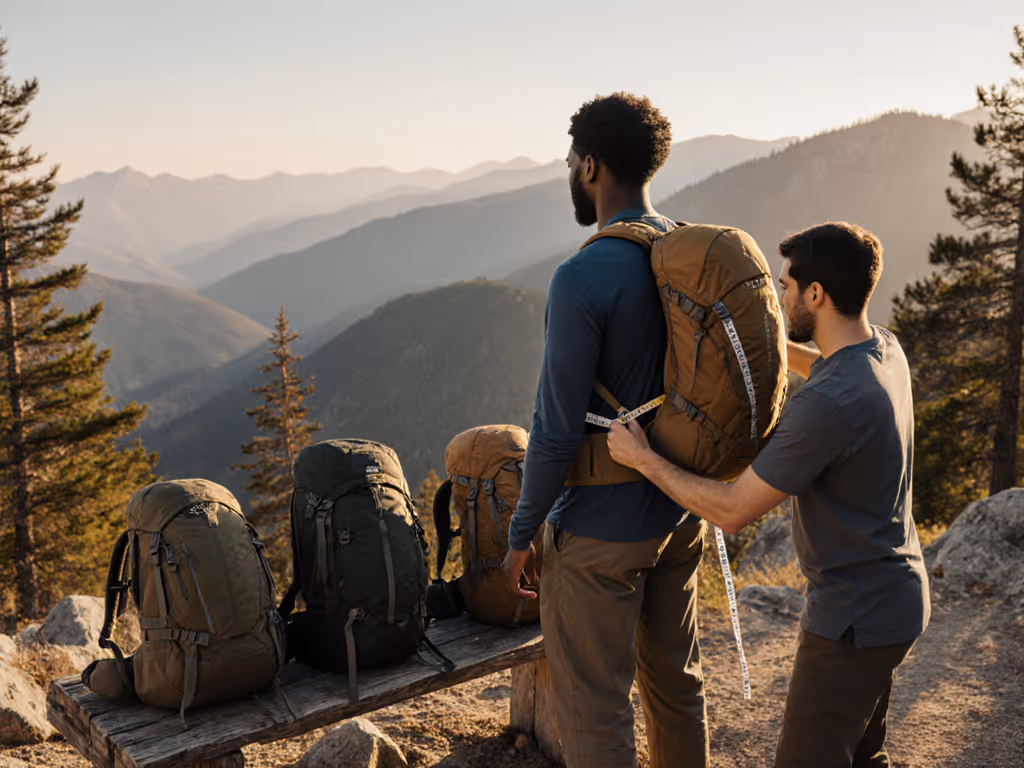
Before you cinch anything, measure and confirm your baseline. Stand tall, tilt your head forward to feel your C7 (seventh cervical vertebra), then measure to the midpoint between the iliac crests on your hips to estimate torso length in cm (centimeter). For a step-by-step walkthrough, use our torso length measurement guide. Select the harness setting that matches this length and verify that shoulder straps leave the back panel slightly above the shoulders for framed packs. Next, place the hip belt so that its padding straddles the iliac crest; this allows 60 to 80 percent of the pack’s weight to sit on the pelvis rather than the shoulders. Only after these anchor points are correct should you shape the rest of the fit, because tweaks made on a faulty base do not stick once you start moving.
Watch This Helpful Video
To help you better understand blog post for 2025-11-10, we've included this informative video from 김학중 목사_꿈의교회 미디어교회. It provides valuable insights and visual demonstrations that complement the written content.
As you fine-tune, remember that every adjustment interacts. Load lifters set too tight can pull the shoulder strap off your chest and collapse ventilation. A sternum strap too high can restrict breathing when you climb, while too low can pinch. Compression straps manage sway but can also crush soft items and shift heavy ones away from the spine if overdone. Hiking Pack Fit’s step-by-step evaluations and our diverse fit database for personalized pack matching help you prioritize the right sequence for your body type, layers, and activity. Want a quick checklist to follow at the trailhead? Use the sequence below and you will be walking comfortably within minutes.
- Measure torso length and set harness height.
- Fit hip belt over the iliac crest and tension until snug.
- Set shoulder strap length until pads lightly hug the chest.
- Dial load lifters to the correct angle, then set the sternum strap height.
- Place heavy gear near the spine, compress evenly, and test on a short walk.
10 Lab-Tested Backpack Adjustments You Can Apply Today
- Set Torso Length Precisely. Adjust the harness so the strap webbing exits the back panel level with the top of your shoulders or slightly below for frameless designs. If the anchor sits well below the shoulders, the shoulder straps drag the pack down and forward, which increases shoulder load. Our testers find that correcting torso length yields the biggest comfort improvement per minute invested.
- Center the Hip Belt on the Iliac Crest. The midpoint of the padding should sit directly over the bony ridge of your hips so load can pass through the pelvis. When set correctly, you should feel 60 to 80 percent of the weight on the hips, even with 20 to 35 lbs (pounds) or 9 to 16 kg (kilograms). If the belt is too low, it slips; if too high, it pinches the abdomen.
- Dial Load Lifter Angle. For framed packs, aim for a 30 to 45 degree line between the shoulder strap and the pack’s top anchor. When in doubt, see our load lifter adjustment guide for diagrams and 45-degree benchmarks. This angle stabilizes the upper mass and relieves shoulder pressure without pulling the strap off your chest. Too flat a line equals no leverage, too steep a line can collapse the shoulder pad and restrict movement.
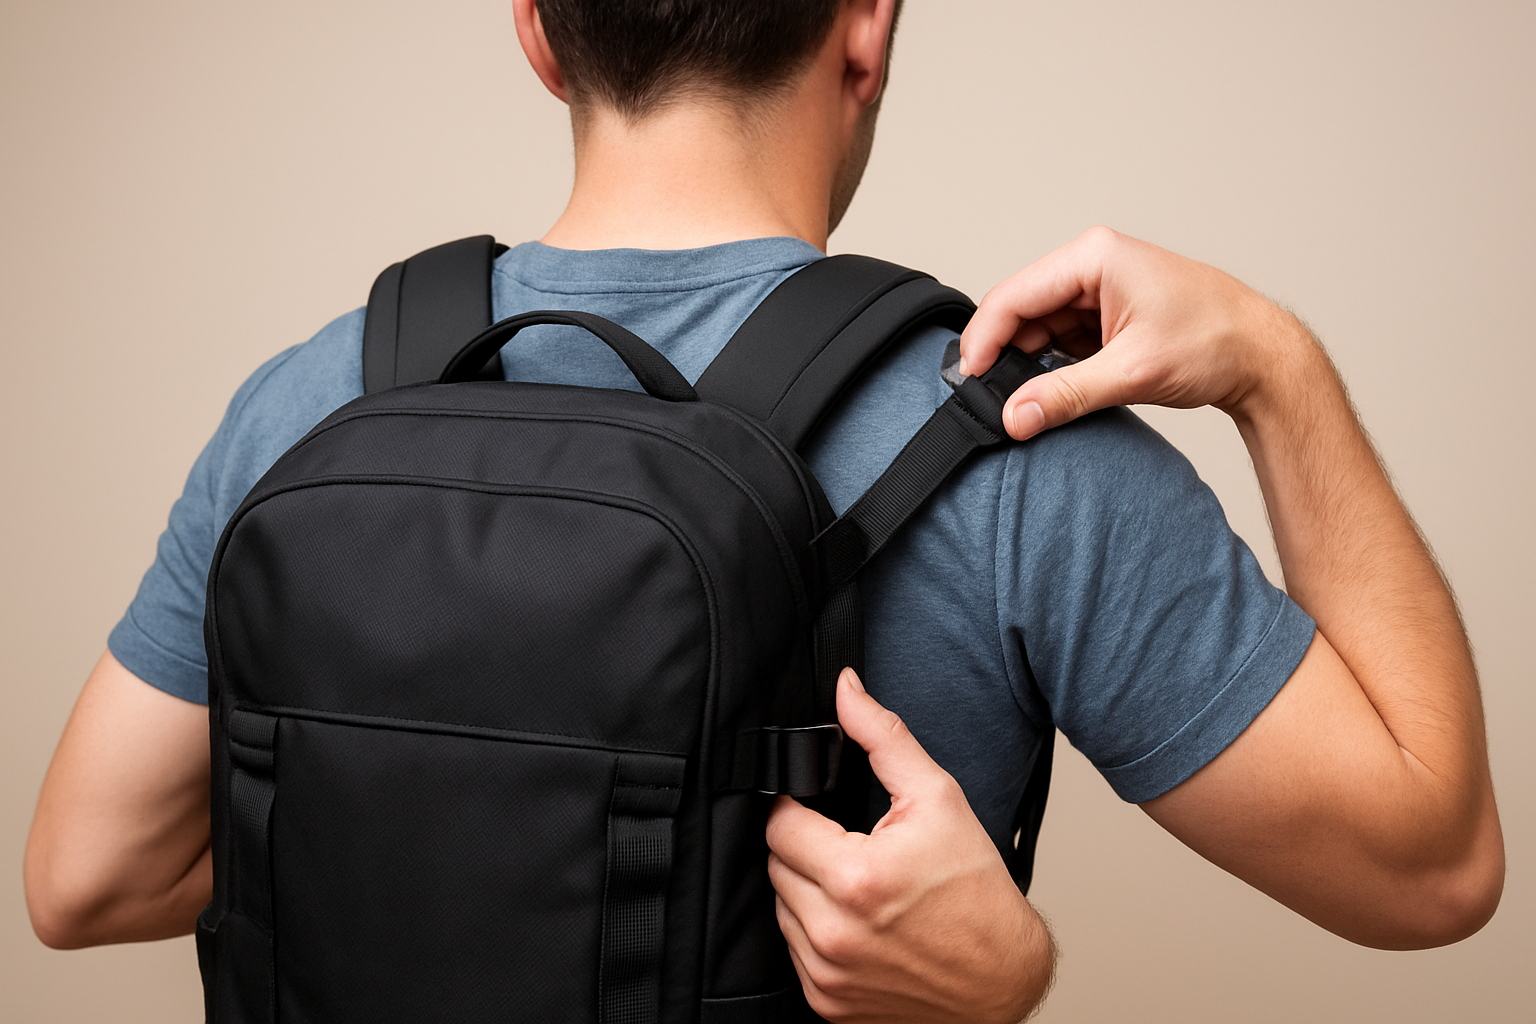
- Balance Shoulder Strap Tension Left to Right. Unequal tension rotates the pack and creates hot spots around the clavicle. Use the same number of pulls on each side, then walk 30 to 60 seconds and retension. If you have narrow shoulders, consider S-curve straps to avoid neck rub, as validated in our lab abrasion tests on curved strap patterns.
- Position the Sternum Strap Thoughtfully. Keep the buckle two to three finger widths below the clavicle to allow chest expansion while preventing strap splay. Tension until the shoulder straps stop sliding outward, then stop. Over-tightening can impede breathing on climbs and create pressure points near the sternum.
- Shape Frame Stays or Back Panel Curvature. If your pack includes aluminum stays, gently bend them to mimic your lumbar curve. A neutral spine distributes load efficiently and reduces lumbar fatigue. Our bench tests show that a properly shaped stay increases belt contact area without increasing overall belt tension, which means less pinch and more grip.
- Place Heavy Items High and Close to the Spine. Stoves, water, and food should sit between shoulder blade height and mid-back depth, tight to the back panel. This centers mass to reduce pitch and yaw on uneven steps. Soft items like a puffy jacket can fill voids below, preventing roll and rattle.
- Use Compression to Reduce Bounce, Not to Crush. Start with the bottom compression straps to lock the base, then work upward in small increments. Even compression eliminates sway and keeps the load path straight. For complete packing layouts that prevent sway, follow our weight distribution guide. If the pack looks lopsided from the side, loosen and reset rather than cranking one strap tighter.
- Add the Right Comfort Accessories. A modest lumbar insert made of EVA (ethylene-vinyl acetate) foam can improve belt grip on straighter spines. Shoulder strap pockets shift recurring items like snacks and a phone forward to reduce unnecessary off-on cycles. Camera chest holsters can take three to four lbs (pounds) off the pack’s front panel, balancing the system for photographers.
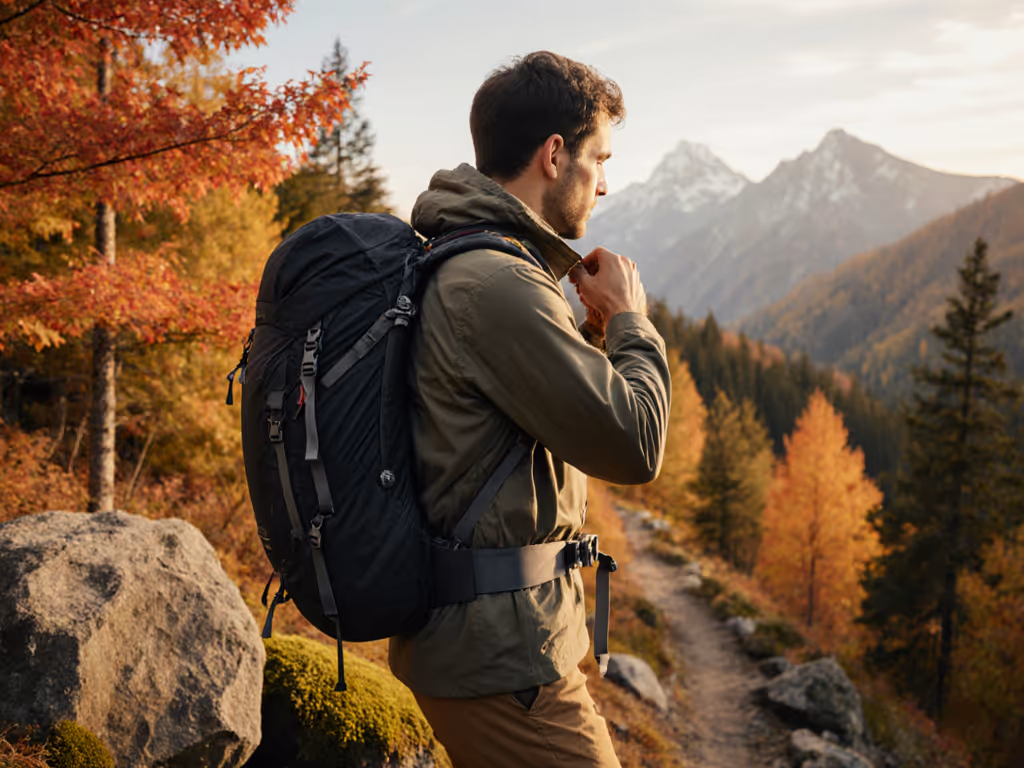
- Season-Proof Your Adjustments. Thicker layers shorten the effective torso and increase strap friction. After you don a jacket, repeat a 30-second micro-tune of shoulder straps and the sternum buckle. Use a pack liner or cover with DWR (durable water repellent) to keep weight stable in drizzle and avoid water pooling in side pockets.
Fit Benchmarks and Data: Targets for Torso, Hips, and Straps
Numbers are not everything, yet the right ranges focus your effort. Hiking Pack Fit’s lab sessions and field logs suggest that certain targets consistently produce stable, low-fatigue carries across ages and body types. Treat these as starting points, then personalize by feel on a two-minute test walk with a few stairs if possible. If you change footwear stack height or add a puffy mid-hike, retest quickly; those changes shift angles and strap friction. Below is a quick data snapshot with metrics that matter most on fall terrain.
| Metric | Target Range | How to Measure | Common Mistake | Quick Fix |
|---|---|---|---|---|
| Torso length setting | Matches C7 (seventh cervical vertebra) to iliac crest length | Measure in cm (centimeter) and set harness to nearest mark | Harness too low, shoulder strap digs in | Raise harness 1 to 2 cm (centimeter) and retest |
| Hip belt position | Padding centered on iliac crest | Feel for bony ridge; mirror check if available | Belt riding on abdomen or sliding off hips | Shift belt up or down 2 cm (centimeter) and snug in small increments |
| Load lifter angle | 30 to 45 degrees | Visual triangle from shoulder to pack top | Straps nearly horizontal give no leverage | Move anchor higher or shorten lifters slightly |
| Sternum strap height | 2 to 3 finger widths below clavicle | Check while breathing deeply | Set too high and restrictive | Slide down 1 to 2 cm (centimeter), retension lightly |
| Shoulder strap contact | Even contact, no neck rub | Two fingers clearance from neck edge | Straps splay off shoulders | Use sternum strap and equalize left-right tension |
| Load distribution | 60 to 80 percent hips, remainder shoulders | Loosen shoulders briefly; pack should stay anchored by belt | All weight on shoulders | Retension hip belt and increase load lifter angle |
| Compression balance | Symmetric front profile | Side view check against door or wall | One side overly tight, pack twists | Loosen both sides and re-compress evenly |
| Back ventilation gap | Light contact or mesh tensioned evenly | Hand slides with slight resistance | Collapsed mesh causes hot spots | Retension load lifters slightly and shape stays |
Specialized Setups: Photography, Fishing, Climbing, and Seniors

Different activities place different demands on organization and balance. Photographers need fast chest access without shoulder bite. Anglers want rod management that does not snag brush. Climbers prioritize rope and helmet carry that stays centered during scrambles. Seniors benefit from ergonomic padding that grips without high tension and buckles that are easy to manipulate with reduced hand strength. Hiking Pack Fit evaluates these needs with activity-specific testing and offers guidance on specialized pack organization for photo, fishing, and climbing, along with senior-friendly backpack recommendations that keep comfort front and center. Dive deeper with our specialized organization strategies for photography, fishing, and climbing kits.
Use the table below to map your activity to the features and fit emphasis that will make your day smoother. Add-ons can be the difference between a pack that is good on paper and a carry that feels excellent for six hours. We also verify durable and repairable packs through field tests, because extending the life of a pack you have already dialed saves money and keeps the planet in mind. When in doubt, test with the actual tools you carry and replicate a few minutes of your most awkward movement, such as crouching to set a tripod or stepping high onto granite.
| Activity | Organization Feature | Fit Emphasis | Add-on Tips |
|---|---|---|---|
| Photography | Camera cube with top and side access | Balanced front load using a chest holster | Quick-release sternum strap; shoulder pocket for lens cap |
| Fishing | Rod tube carry and wet pocket | Lower center of gravity for stability near water | Elastic keepers for line; small hip-belt pouch for flies |
| Climbing | Rope strap on top and helmet cradle | High load lifter angle for vertical moves | Compact chalk pocket; reinforced haul loops |
| Seniors | Soft-grip hip belt and easy buckles | Maximum load to hips with gentle shoulder tension | EVA (ethylene-vinyl acetate) lumbar pad; trekking pole holsters |
- Keep heavy gear tight to the spine even when using front holsters or pouches.
- Recheck sternum strap height after adding a camera or rod holster to maintain breathing comfort.
- Consider lighter layers with high warmth-to-weight to avoid sudden geometry shifts mid-hike.
How Hiking Pack Fit Guides Your Perfect Match
Hikers often struggle to find the right backpack design and fit to ensure comfort, stability, and reduced fatigue on the trail. Hiking Pack Fit addresses that problem with real-world and lab-backed reviews and guides that translate complex fit science into simple, repeatable steps. Our diverse fit database for personalized pack matching lets you filter by torso length, shoulder width, pelvic shape, and activity, then see which packs tend to work best for people like you. We add senior-friendly backpack recommendations, plus guidance on essential add-ons for improved comfort such as lumbar shims, shoulder pockets, and accessory straps tested for strength and ease of use.
We also care about longevity and value. Our team verifies durable and repairable packs through field tests that include abrasion walks, buckle freeze tests in near-freezing conditions, and strap slippage audits over thousands of simulated steps. Small repairs like swapping a hip-belt buckle or refreshing DWR (durable water repellent) can restore performance without a new purchase. For step-by-step fixes and care, see our backpack maintenance guide. Not sure what to fix in the moment? Use the quick-troubleshoot table below, then plan a deeper tune at home using our step-by-step resources.
| Trail Symptom | Likely Cause | Fast Trail Fix |
|---|---|---|
| Shoulders ache within 10 minutes | Hip belt not carrying enough load | Raise and retension belt; increase load lifter angle slightly |
| Neck rub or chafing | Straps too close together or sternum strap too high | Slide sternum strap down; equalize strap spacing |
| Pack sways on descents | Loose side compression and heavy items far from spine | Repack heavy items high and tight; compress bottom, then top |
| Low back hotspot | Belt slipping on layers or stay shape does not match | Add a thin lumbar pad; gently shape stays to lumbar curve |
| Shortness of breath on climbs | Sternum strap overtightened or placed too high | Loosen one notch; move buckle 2 cm (centimeter) lower |
Finally, we combine these tools with approachable coaching. Think of our guides as a hiking partner who has already tinkered with a hundred packs so you do not have to. Whether you identify as a backpacker, a photographer, an angler, a climber, or a senior adventurer, our process helps you carry smarter. With the right match from our fit database and a few two-minute adjustments, the pack becomes a quiet, supportive part of your stride rather than a distraction you endure.
Real-world example. Two hikers tested the same pack for a 10 mile loop with 28 lbs (pounds) total weight. The first hiker left the hip belt low and load lifters flat; the second centered the belt on the iliac crest and set lifters to 35 degrees. The first reported shoulder burn by mile three and an average pace of 2.2 mph (miles per hour); the second finished without hotspots and averaged 2.6 mph (miles per hour). Fit is not a luxury. It is a performance multiplier you can unlock in minutes.
Conclusion
Comfort on fall hikes comes from ten small, smart adjustments that channel weight to your hips, steady the load, and let you breathe freely.
Imagine hitting the trail, tweaking two buckles, and feeling the whole pack float as if it were custom built for you. Over the next 12 months, the hikers who master these micro-tunes will hike farther with less fatigue and fewer aches.
As you apply this blog post for 2025-11-10, which single adjustment will you test first on your next crisp-morning walk to turn effort into ease?
Personalize Your Pack With Hiking Pack Fit
This blog post for 2025-11-10 is your start, tap our diverse fit database and lab-backed guidance to match a pack to your body and activity, elevating comfort for all hikers.
Related Articles