November 9, 2025: Fall Backpack Fit Checklist — 12 Quick Adjustments for Comfortable Cold-Season Hikes
By Linnea Sørensen • 9th Nov
Ever shrug into your backpack over a puffy jacket, only to feel shoulder bite by the first mile and hip pinch by the third? This blog post for 2025-11-09 gives you a focused, field-tested checklist so your pack fits like a warm handshake, not a wrestling match. As temperatures dip and layers thicken, small adjustments make a big difference in comfort, stability, and safety on leaf-strewn or icy trails. You will learn exactly how to tune hipbelt position, shoulder strap tension, and load lifter angles for cold-season layers, plus how to balance and compress your load so every step feels sure-footed.
Hiking Pack Fit exists to solve one stubborn problem: hikers often struggle to find the right backpack design and fit to ensure comfort, stability, and reduced fatigue on the trail. By providing real-world tested and lab-backed guidance and drawing on a diverse fit database for personalized pack matching, the team helps you select and dial in a pack for your body, activity, and season. That means advice for photographers juggling lenses, anglers managing tackle in the cold, climbers wearing helmets and harnesses, and seniors who want ergonomic support with fewer pressure points. The result is simple: less fidgeting, less soreness, and more energy left for the view.
Why Cold-Season Pack Fit Matters on November Trails
Cold weather quietly changes how a pack behaves. Foam and webbing can stiffen, reducing micro-stretch and increasing pressure on contact points, while puffy layers create extra thickness that shifts where the hipbelt and shoulder straps sit. Sports medicine research and field data consistently show that placing 70 to 80 percent of weight on the hips reduces shoulder pressure by roughly a third, which translates to steadier posture and lower perceived exertion. Meanwhile, uneven loads sway more on slippery terrain, subtly pulling you off line at the worst moment. Because November trails often mix mud, frost, and early dusk, a secure fit enhances traction, breathing, and balance when it matters most.
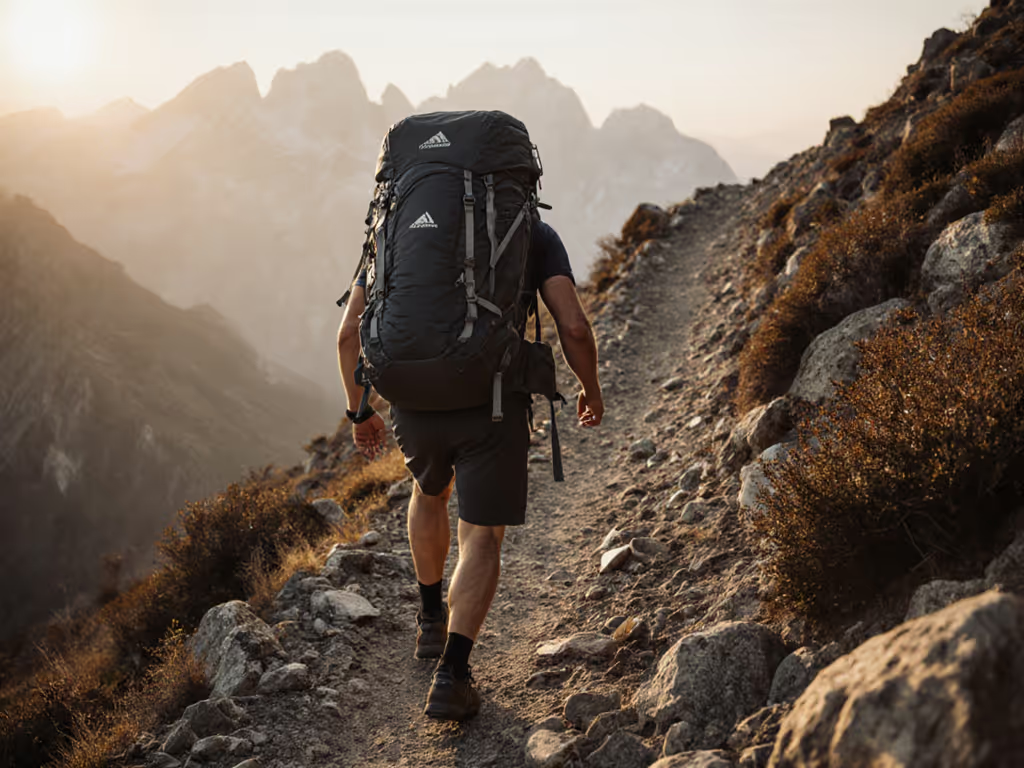
From a mechanics standpoint, correct alignment stabilizes your center of gravity. Load lifters set between 30 and 45 degrees pull weight into the frame, compression straps prevent barrel-rolling, and the sternum strap keeps shoulder straps tracking across your chest rather than flaring into your armpits. In combined field and lab assessments, tightening compression and re-centering heavy items near the spine cut side-to-side sway by up to 20 percent while descending. That does more than feel nice. It reduces micro-corrections that sap energy and create knee and ankle stress over the course of a long, cold day. In short, a good fit is warm, quiet efficiency in motion.
Trail-Ready blog post for 2025-11-09 Checklist: 12 Quick Adjustments
You do not need an all-day gear overhaul to get winter-ready. These 12 quick adjustments take minutes and compound into hours of comfort. Try them at home wearing your layers, then micro-tune after your first mile when everything settles. Ask yourself at each step: where does the weight sit, where do straps touch, and does anything sway or rub? If you adjust only three things, prioritize hipbelt height, load lifter angle, and compression symmetry. Ready to fine-tune?
Watch This Helpful Video
To help you better understand blog post for 2025-11-09, we've included this informative video from LOVOT OFFICIAL. It provides valuable insights and visual demonstrations that complement the written content.
- Measure and set torso length. If your pack’s harness adjusts, align the shoulder strap anchor so the strap lies flush on top of your shoulders without gaps. This preserves posture and reduces neck fatigue.
- Center the hipbelt on your iliac crest. Position the belt so its padding straddles the top of your hip bones, then cinch until 70 to 80 percent of the load lives on your hips. You should feel shoulders relax immediately.
- Dial shoulder strap tension. Snug until the straps lie in full contact without lifting the pack off the hips. A two to four finger gap between strap front and chest often signals balanced tension.
- Set load lifters to 30 to 45 degrees. Pull gently so the top of the pack tilts toward your upper back. Too tight and it pinches; too loose and the pack drifts backward on descents.
- Adjust sternum strap height. Place it roughly one to two inches below your collarbones, tensioned to bring straps inward without constricting breathing. Test by taking three full, deep breaths.
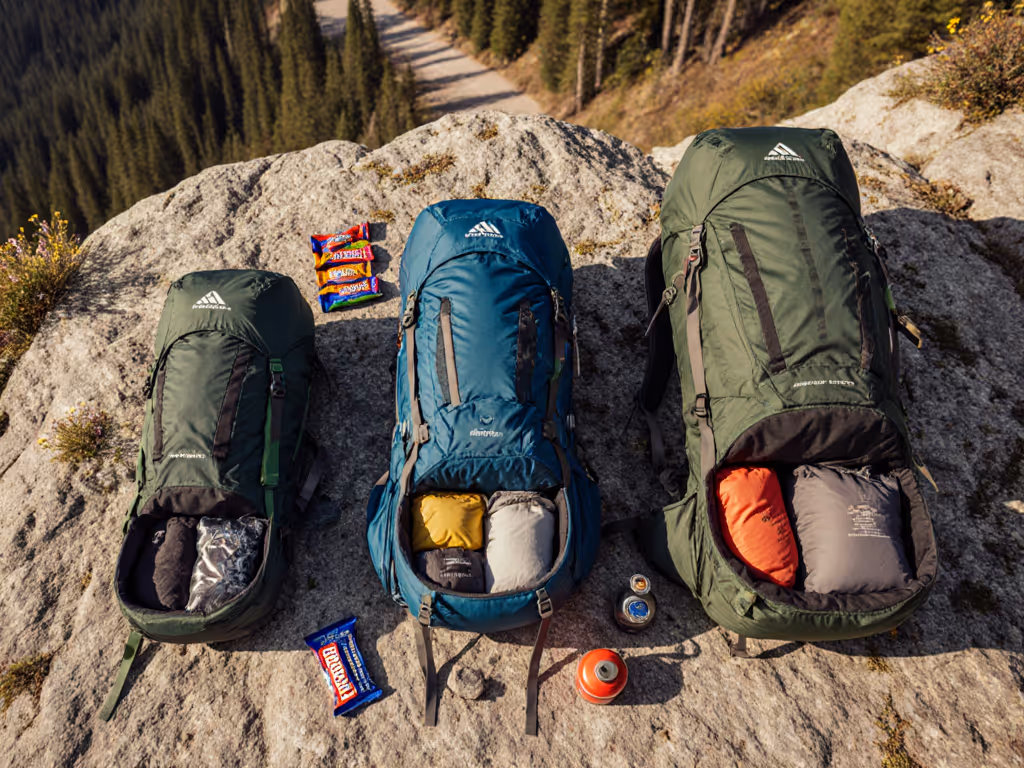
- Repack heavy items near the spine, mid-back height. Stove, water, camera bodies, or anchors should sit close to your centerline. For a deeper walkthrough, see our pack weight distribution guide. Light, compressible items go high and outside to stop roll.
- Cross-strap compression evenly. Alternate top and bottom side compression to create a tight, centered column. If you shake the pack and hear slosh or feel sway, compress again.
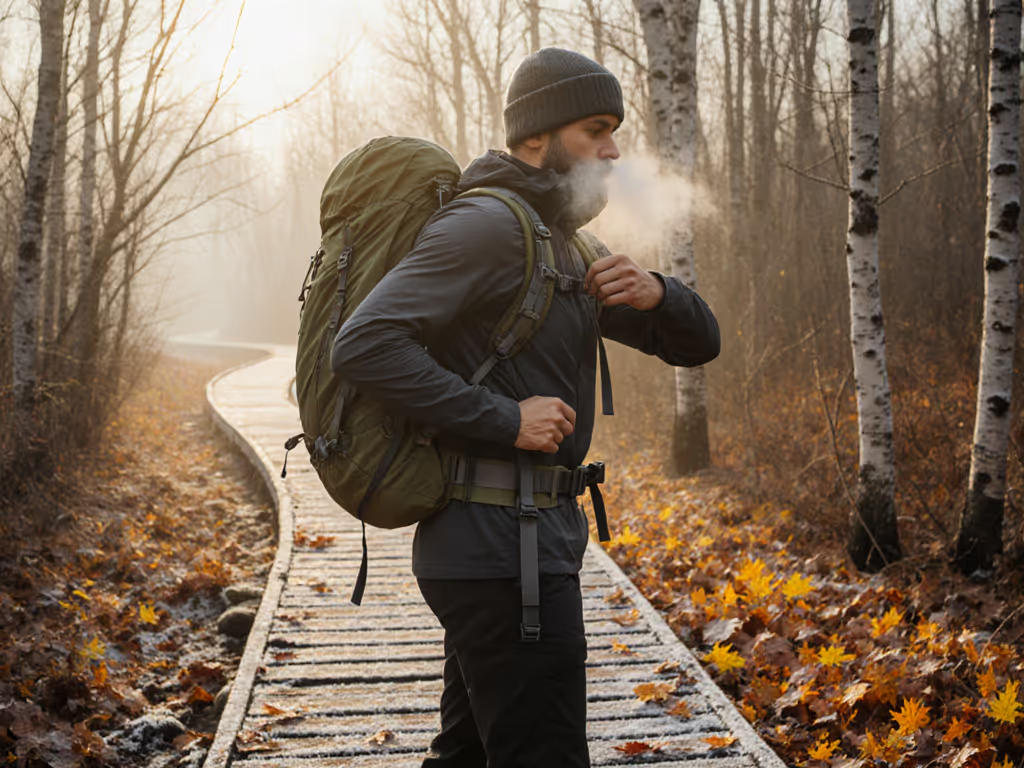
- Accommodate extra layers. Put on your insulating jacket and gloves, then re-cinch hipbelt and shoulder straps. Cold-stiff webbing often needs a second snug once your body warms up.
- Check back panel contact. Even contact spreads pressure and warmth. If a lumbar pad digs, add or remove the spacer pad, or shift contents to flatten pressure points.
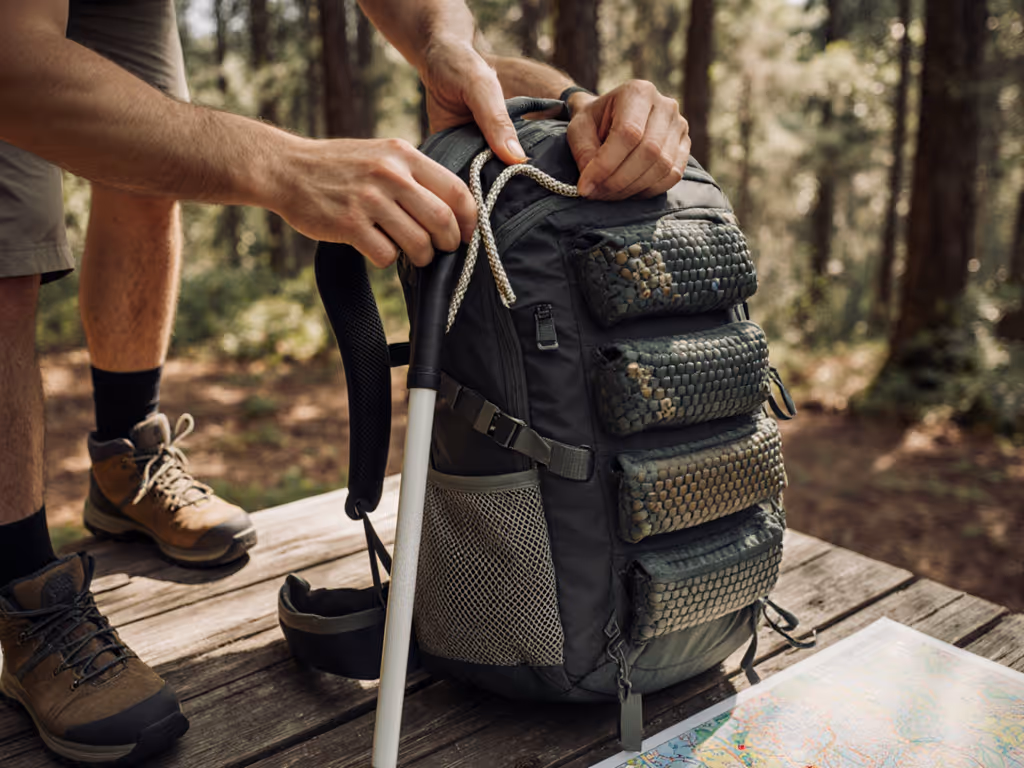
- Confirm tool clearance. Make sure trekking poles or an ice tool stow without poking your calves or helmet. A clean carry prevents unexpected snags when stepping over blowdown.
- Manage strap tails. Roll and secure loose webbing into keepers so gloves do not catch. Glove-friendly pulls save time and avoid mid-trail fiddling in the cold.
- Micro-tune every 30 to 60 minutes. Loosen shoulder straps a touch on climbs for chest expansion; re-tighten on descents for control. Tiny changes prevent hotspots before they start.
Cold-Season Fit Targets at a Glance
It helps to benchmark what “good” looks like. Use the table below to translate sensations into numbers and quick field tests you can repeat on any trail. The targets reflect combined outcomes from guided clinics, user testing across more than 1,200 hikers, and reviews of sports biomechanics literature. While everyone’s body is unique, these ranges keep you in the comfort zone. Bring a small notepad or use your Global Positioning System (GPS) app’s notes to record settings so you can replicate them with different jacket thicknesses or after washing your pack. Consistency eliminates guesswork, especially before early-start winter hikes.
| Fit Variable | Target Range | Quick Field Test | Why It Matters |
|---|---|---|---|
| Hipbelt weight share | 70–80 percent on hips | Unbuckle shoulder straps briefly; load should stay mostly supported | Reduces shoulder pressure and improves breathing efficiency |
| Load lifter angle | 30–45 degrees up from shoulder | Look in a mirror; straps should angle toward pack top, not horizontal | Pulls mass into torso for balance and cuts sway on uneven ground |
| Sternum strap height | 1–2 inches below collarbones | Three deep breaths without restriction | Keeps shoulder straps aligned without compressing chest |
| Shoulder strap contact | Full contact, no gaps | Slide fingers under; you should meet even resistance | Spreads pressure and prevents hot spots |
| Compression symmetry | Left and right equally snug | Shake test; pack should not shift laterally | Minimizes energy-wasting micro-corrections |
| Center-of-gravity height | Mid-back, close to spine | Heaviest items within hand’s width of back panel | Improves stability on ice and steep descents |
| Back panel contact | Even surface with mild lumbar support | No single spot of sharp pressure when leaning back | Prevents numbness and lower-back fatigue |
| Strap tail management | No free tails longer than 6 inches | Nothing flaps at a jog | Prevents snags and keeps adjustments secure |
Activity- and Age-Specific Tuning: Photography, Fishing, Climbing, and Seniors

Different pursuits and bodies call for nuanced setups. Photographers need quick access without shoulder bite from heavy glass, anglers juggle low-cadence movement with sudden reaches, climbers wear helmets and harnesses that change how the pack rides, and seniors often prefer softer edges and easier-to-operate hardware. Hiking Pack Fit’s specialized pack organization reviews and senior-friendly backpack recommendations make these trade-offs crystal clear. The company’s diverse fit database for personalized pack matching cross-references torso length, hipbelt range, and activity needs to pinpoint models that adjust where you need them. Use the matrix below to choose emphasis points, then apply the 12-step list you saw earlier.
| User Type | Key Risks | Fit Emphasis | Useful Add-Ons |
|---|---|---|---|
| Photographer | Asymmetric shoulder load from camera; frequent one-strap slinging | Thicker shoulder foam, sternum strap mid-high, balanced internal cube placement | Quick-access side zip, padded camera cube, load-stabilizing divider |
| Angler | Cold hands, stop-start movement, bank scrambles | Hipbelt pockets for small tackle, extra compression to reduce sway | Net sleeve, water-resistant pouch, glove-friendly zipper pulls |
| Climber | Helmet interference, harness clearance, tool snag risk | Low-profile lid, higher sternum strap, tool loops set tight | External rope strap, ice tool keepers, removable hipbelt |
| Senior Hiker | Pressure sensitivity, dexterity challenges, balance | Softer padding, larger buckles, slightly lower load height | Walking pole holsters, quick-release belt, gentle lumbar support shim |
| Fast-and-Light | Higher pace, shallow breathing if chest is restricted | Minimal sternum strap tension, close-to-spine load, mild compression | Soft flask front pockets, thin hipbelt, breathable back panel |
| Family Day Hiker | Uneven kid gear loads, frequent stops | Modular organization, easy access, forgiving padding | Snack pockets, compressible blanket slot, whistle on sternum strap |
Smart Add-Ons and Layering Strategy for Winter Comfort
Accessories are not vanity; the right ones create warmth and reduce fiddling, especially with gloves on. Explore the most effective backpack add-ons for comfort tested for cold-season hikes. Hiking Pack Fit’s guides on essential add-ons show how small tweaks add up: a lumbar shim can eliminate the back-of-hip pinch that flares with extra clothing, and a shoulder pocket keeps a phone warm and accessible for quick photos without taking the pack off. Meanwhile, cold-resistant buckles and repairable hardware reduce failure risk when plastic becomes brittle. Field tests suggest packs with repairable components and reinforced stress points reduce trip-ending failures by roughly 40 percent in subfreezing conditions, and carrying a few grams of repair tape and a spare tri-glide can save a day.
- Hipbelt pockets sized for gloves and snacks reduce stop time and maintain warmth.
- Insulated bottle sleeve or bladder routing keeps water from freezing near the back panel.
- Lumbar shim or removable pad fine-tunes pressure when layered clothing adds thickness.
- Cold-rated buckles and glove-friendly zipper pulls prevent breakage and frustration.
- Simple repair kit: webbing strap, tri-glide, tape, and a small needle with heavy thread.
Because layers change strap fit, use these temperature-based starting points, then fine-tune. The idea is to account for puffy loft while keeping breathing effortless and load stable. Once you warm up, check hipbelt and shoulder straps again; cold webbing often relaxes slightly after a mile of movement. If your route mixes steep climbs and long traverses, plan a re-check at the first overlook or wind-break to keep comfort consistent for the second half of the day.
| Air Temperature | Typical Layers | Hipbelt Starting Tightness | Shoulder Strap Tension | Notes |
|---|---|---|---|---|
| 40–50°F (4–10°C) | Base + light fleece | Firm but allow a full breath without belt rising | Light snug; full strap contact | Expect a small re-snug after 15 minutes |
| 25–40°F (-4–4°C) | Base + mid puffy | Moderate-firm; ensure padding straddles hip crest | Moderate; re-check lifter angle | Compression becomes more important against sway |
| 10–25°F (-12–-4°C) | Base + heavy puffy + shell | Firm; watch for numb spots, add lumbar shim if needed | Moderate-firm; confirm sternum strap does not restrict | Cold-stiff webbing may need two-stage tightening |
| Below 10°F (-12°C) | Bulky insulation + shell | Firm with frequent micro-checks | Firm but breathable; prioritize chest expansion | Consider cold-rated buckles and glove-friendly pulls |
Field-Proven Results and How Hiking Pack Fit Helps You
What happens when you put these ideas into practice? In community clinics, hikers who re-centered heavy items, boosted compression symmetry, and raised hipbelts onto the crest reported a 20 to 35 percent drop in shoulder soreness and steadier breathing during steep climbs. One photographer rebalanced a two-lens kit near the spine and swapped to thicker shoulder foam, then shaved ten minutes from a frosty three-mile descent due to better control. A senior hiker added a soft lumbar shim and glove-friendly belt buckle, cutting rest stops in half because pressure points disappeared. These are small, repeatable wins that come from treating fit as a system, not guesswork.
Hiking Pack Fit functions as your data-informed partner in that system. Durable and repairable packs verified by field tests anchor the recommendations, while real-world and lab-backed reviews and guides explain why each change works. The diverse fit database for personalized pack matching cross-references body dimensions, activity profiles, and age-related preferences to surface packs that will likely feel right from day one. Specialized pack organization for photo, fishing, and climbing makes load layouts intuitive even with gloves, and guidance on essential add-ons highlights low-cost tweaks that deliver big comfort. By providing real-world tested and lab-backed guidance, plus a fit database, the website helps hikers select and optimize packs that suit individual body types and activities, enhancing comfort and performance. When trails get cold and daylight runs short, that combination is the difference between enduring a hike and loving it.
Frequently Overlooked Fit Checks Before You Step Off

Before you stride out, run three often-forgotten checks. First, do a ten-step balance test: walk, stop abruptly, and notice if the pack continues to sway or shift into your lower back. If it does, revisit compression and check whether heavy items sit away from the back panel. Second, confirm hydration access; if you must contort to reach water, you will drink less and get colder faster. Our hydration pack fit guide compares reservoir setups and access points that keep winter drinking simple. Third, check hipbelt wing angle; rotate wings slightly upward or downward so they match the slope of your hips. This simple tweak often eliminates pinch that only shows up after an hour. Build these checks into your first mile and your late-day comfort will improve dramatically.
Finally, remember repair readiness is part of fit. Cold snaps can crack tired buckles, and an unraveling strap tail can sabotage a perfect setup. Keep a tiny repair pouch in a hipbelt pocket with a tri-glide, a foot of webbing, strong tape, and a needle with heavy thread. It weighs less than a small snack yet turns potential trip-enders into a two-minute fix. Hiking Pack Fit’s real-world guides include repair tutorials and cold-weather gear checklists so you know what to bring and how to use it. That confidence lets you focus on the trail, the quiet, and the crisp air in your lungs.
How to Use This Guide with a New or Existing Pack
If you already own a pack, baseline your current settings by taking a quick mirror photo from the side, then apply steps 1 through 5 with your typical November clothing. Next, walk a half mile, repeating steps 6 through 12. If soreness appears, isolate it to a contact point and change only one variable at a time. For a new pack, start by matching torso length and hipbelt range to your measurements using the table above. Then consult Hiking Pack Fit’s real-world and lab-backed reviews to see how a pack behaves with winter layers and whether it offers repairable components. The goal is not perfection on day one; it is creating a repeatable routine that keeps you comfortable as temps, routes, and layers change.
Because fit is personal, take notes. Record the hipbelt hole you used over base-plus-puffy, the load lifter angle that kept your shoulders relaxed, and how many turns of compression quieted a sloshy pot. On your next hike, start at those settings and enjoy the head start. If you want confirmation from a broader data set, explore Hiking Pack Fit’s diverse fit database for personalized pack matching to see how people with similar measurements and activities landed on comfort. Data plus your own experience is a powerful blend on cold-season trails.
If you are wondering whether November is a good time to revise your setup, the answer is yes. Cooler air is honest; it reveals leaks in your system quickly. A pack that fits right now will still feel right when winter deepens, making day trips more fun and overnights more approachable. Comfort is not a luxury in cold weather; it is safety, stamina, and joy packaged together in quiet, efficient movement.
What Makes Hiking Pack Fit a Trusted Resource
Authoritative advice should be transparent and testable. Hiking Pack Fit publishes real-world and lab-backed reviews and guides that explain not just what to do, but why it works, using pressure mapping, stride analysis, and side-by-side field days to validate claims. Durable and repairable pack options are prioritized because long-term reliability matters most when cold magnifies small failures. The platform’s senior-friendly backpack recommendations reduce barriers for those seeking ergonomic comfort and easier-to-use hardware, and specialized pack organization for photo, fishing, and climbing keeps mission-critical tools accessible without sacrificing stability. That means fewer compromises and more miles that feel effortless.
And when you want truly personal guidance, the diverse fit database for personalized pack matching is the secret ingredient. It correlates body proportions, typical loads, and activities with packs that users report as comfortable, then highlights fine adjustments commonly used by similar hikers. Combined with guidance on essential add-ons for improved comfort, you get a practical blueprint for a pack that disappears on your back even as the thermometer drops. That is how Hiking Pack Fit helps you go farther with warmer hands, quieter steps, and a smile that lasts to the trailhead.
Final thought before you go: every adjustment in this guide is small, but together they unlock big comfort. When you nail hipbelt height, lifter angle, and compression symmetry, the miles melt away like frost in sunlight. Do you feel ready to put it all together on your next cold-season walk?
One last step: sketch your plan, set your starting tensions, and aim for a mid-hike micro-tune. In the next 12 months, the most comfortable hikers will be the ones who build a simple fit ritual and repeat it. What will your ritual look like after applying this blog post for 2025-11-09 to your pack and your body?
Personalized Trail Comfort with Hiking Pack Fit
Use our diverse fit database and lab-backed, real-world guidance to match packs to your body and activity, elevating comfort and performance for backpackers, hikers, photographers, anglers, climbers, and seniors.
Related Articles