Tactile Backpack Organization for Visually Impaired Hikers
By Linnea Sørensen • 20th Jan
When hiking with visual impairments, your backpack becomes more than gear; it transforms into a tactile command center. Mastering tactile backpack organization means converting chaos into confidence, one consistent texture at a time. Because comfort isn't a luxury; it's your right to move through wilderness with autonomy. Fit is respect, and that starts long before you hit the trail. If you're unsure of sizing, use our torso length measurement guide to get the foundation right. Today, we'll explore how to structure your pack so every zipper pull, compartment, and gear slot feels intuitive under your fingertips.
Why Tactile Organization Matters for Trail Independence
Visual impairment doesn't diminish the thrill of summit views or forest solitude; it simply reshapes how we navigate toward them. Ill-organized gear creates invisible barriers: fumbling for water during a scorching climb, misplacing trail snacks when energy dips, or (worse) storing your cane where it becomes a tripping hazard. Thoughtful tactile backpack organization turns potential stumbles into smooth transitions. It's why countless hikers I've fitted at community events light up when they realize their gear can adapt to their body and sensory needs. That moment when tension leaves their shoulders? That's fit as care in action.
How do I create consistent tactile landmarks inside my pack?
Treat your backpack like a Braille map: each compartment needs distinctive, repeatable textures. Here's how:
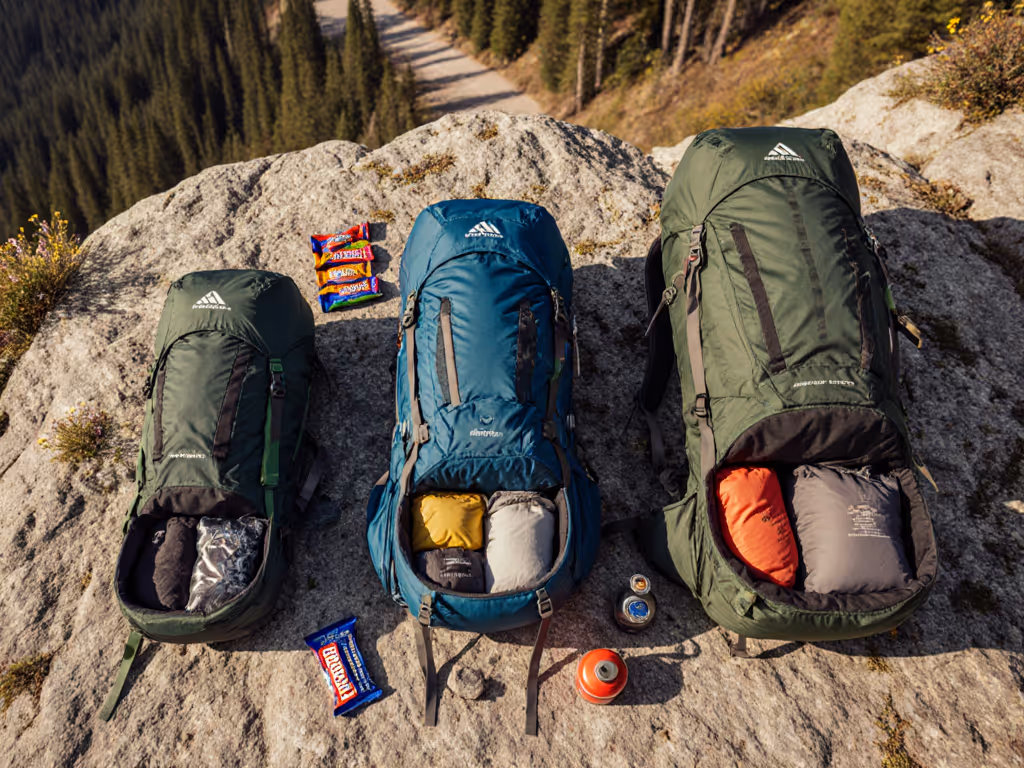
- Layer texture cues: Use rubberized zipper pulls on main compartments, smooth fabric tags for hydration sleeves, and ridged toggles for emergency pockets. Consistency is key: always place the water bottle in the left side pocket with a knotted cord detail, while the right stays smooth for trekking poles. For quick-access essentials, dial your hip belt pocket organization so small items are always where your fingers expect them.
- Rotate gear intentionally: Position cylindrical items like fuel canisters vertically, they'll nestle differently under touch than flat boxes. A folded map should create a soft, crinkly ridge against the pack wall.
- Embrace removable identifiers: Velcro-backed tactile patches (like stretchy silicone dots or woven loops) let you customize compartments. One dot for first-aid, two for snacks (no sight required). To build these tactile landmarks, consider essential backpack add-ons like textured zipper pulls and modular labels. This mirrors how some blind hiker backpacks integrate modular labeling systems.
Your trail map lives in your hands now. Let textures tell the story gear usually hides.
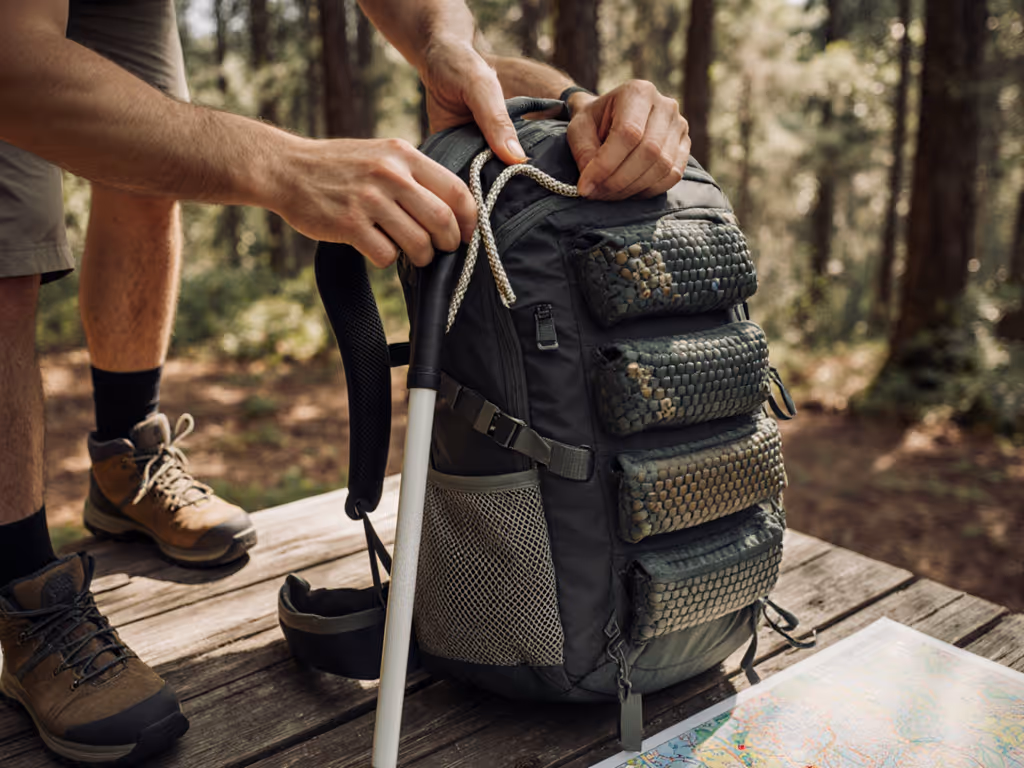
Where should I store my mobility cane during hikes?
This is where many trail days unravel. A dangling cane risks tangling; shoving it haphazardly creates instability. Instead:
- Dedicate a vertical sleeve: Use a side-access pocket designed for upright storage (common in accessibility hiking gear). Test it: when fully loaded, your cane should slide in/out without disturbing other items.
- Anchor it securely: If your pack lacks a cane holder, strap it horizontally across the front using compression straps, but add a rubber grip strip where your hand meets the cane. This prevents slippage on steep descents.
- Create a tactile exit point: Mark the top of the cane sleeve with a raised cord or split-ring keychain. You'll feel that familiar bump when reaching back, eliminating second-guessing.
Pro Tip: Some hikers wrap the cane's handle with grip tape featuring a unique pattern, like diagonal grooves versus the pack's vertical ridges. This creates instant recognition through contrasting textures.
How can high-contrast features help without relying on sight?
High-contrast backpack features aren't just visual aids, they create tactile boundaries. That bright orange lining inside a pocket? It's not for sighted people alone. The color shift often corresponds to a fabric texture change (e.g., smooth nylon against brushed polyester), giving your fingers an extra confirmation signal. When zipping compartments, look for:
- Dual-tone zipper tapes: One side ribbed, one side flat. Your thumb instantly knows if the zipper is fully closed.
- Temperature variations: Metal buckles feel distinctly cooler than plastic under fingertips, a subtle checkpoint during adjustments.
- Shadow seams: Deeply stitched edges create slight ridges that guide hands to specific pockets. This is why many purpose-built packs use contrasting thread that raises the seam profile.
What's the most overlooked tactile organization hack?
Compartment filling order. Unlike sighted hikers who eyeball space, we can't afford empty voids where gear shifts unpredictably. Try this sequence:
- Anchor heavy items first: Place your water reservoir or camera lens against the back panel. This creates a stable, flat surface your spine settles against.
- Fill gaps with soft buffers: Crumpled clothing or foam pouches in odd spaces prevent rattling. I'll often roll a buff tightly, it becomes a smooth, cylindrical wedge that fits perfectly in triangular voids.
- Leave "negative space" tactilely: Designate one empty pocket (marked by a loose bead inside) for trail debris like pinecones or found stones. Its emptiness becomes a recognizable texture.
This transforms non-visual trail navigation from reactive to proactive; you'll sense load shifts before they unbalance you. For a step-by-step packing plan, use our weight distribution guide.
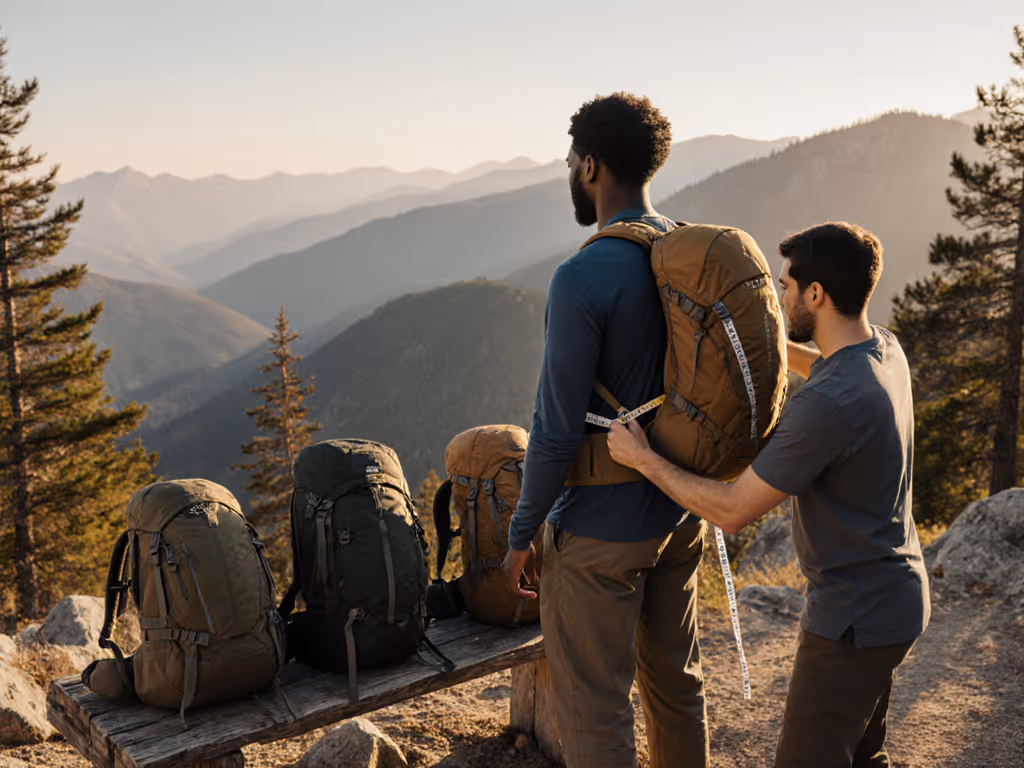
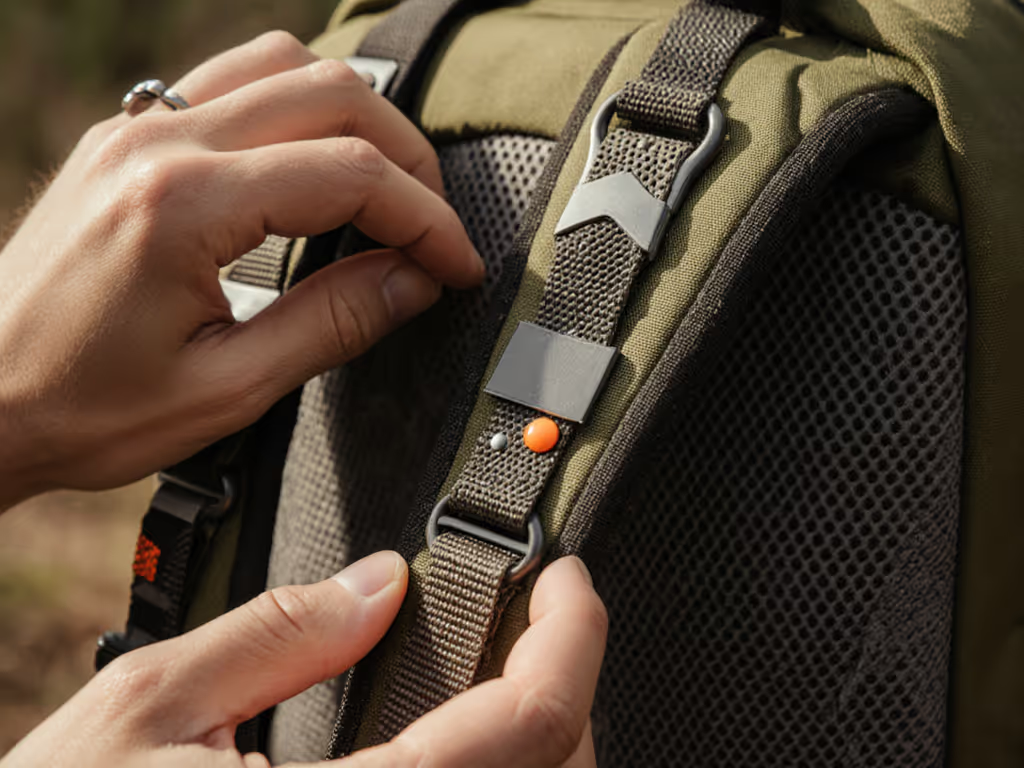
Can torso adjustments affect tactile organization?
Absolutely. A poorly fitted harness misaligns your entire tactile landscape. When hip belts ride too high, they push pockets upward, making that carefully placed snack pouch now sit under your shoulder blade. Here's how to sync fit with function:
- Adjust torso after loading: Many hikers tweak straps pre-hike, but true stability emerges at trail weight. Walk 10 minutes with your loaded pack, then: For precise strap tuning, follow our load lifter angle guide.
- Tighten hip belt until pressure centers on pelvic bones (not waist)
- Raise load lifters until they angle parallel to your shoulders
- Shift sternum strap to collarbone height without breast tissue compression
- Test compartment access mid-adjustment: Can you still reach your map pocket while wearing gloves? Do hip belt buckles sit where your fingers naturally rest? If not, micro-adjust harness points until textures meet your touch zones.
Remember: if your body feels contorted to reach gear, the pack isn't respecting you. Fit that respects your body feels like permission.
Your Next Step Toward Confident Trail Days
Grab your pack right now (not fully loaded, but with one essential item inside: water bottle, snacks, or your cane). Close your eyes. Walk 20 paces. Did you fumble for the zipper? Did the load shift unexpectedly? These micro-moments reveal where your tactile backpack organization needs refinement. Try one texture adjustment today: knot a cord on your water pocket, attach a rubber patch to your map sleeve, or reposition your cane holder. Then share what you discovered in our community forum, your insight might be the missing texture another hiker needs. Because when we map the trail through touch, we're not just carrying gear. We're carrying each other forward.
Related Articles